
Introduction
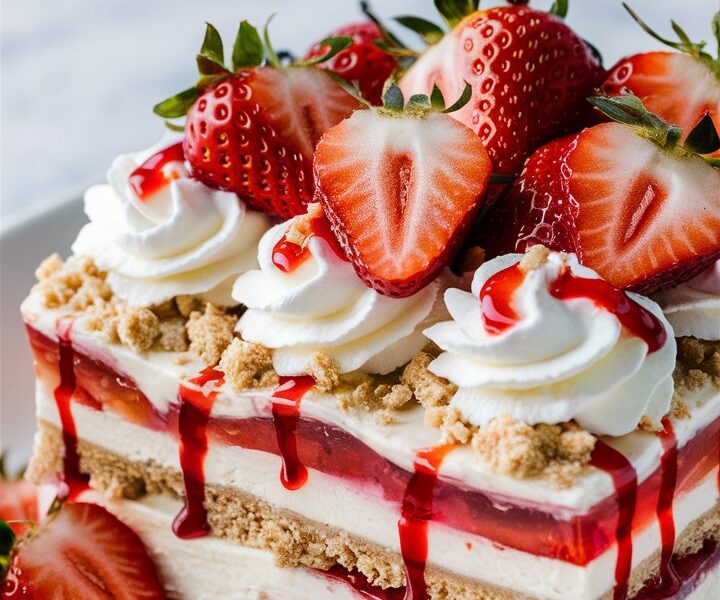
If you’re looking for a dessert that’s as stunning as it is simple to make, this No-Bake Strawberry Jello Lasagna is the ultimate treat. It’s a beautiful, layered masterpiece that combines a buttery graham cracker crust, a smooth and tangy cream cheese filling, a refreshing strawberry Jello layer with fresh fruit, and a final cloud of whipped topping.
What makes this dessert so irresistible is that it requires no baking at all. No ovens, no complicated techniques—just easy steps and heavenly flavor. It’s perfect for summer gatherings, family dinners, or any occasion when you want to impress guests without spending hours in the kitchen.
This dessert is also incredibly flexible. You can customize it with different Jello flavors, fruits, or even alternate crusts like Oreos for a chocolate twist. Once you make it, you’ll understand why no-bake desserts like this one have become a modern-day favorite on food blogs and social media platforms worldwide.
Why No-Bake Desserts Are So Loved

No-bake desserts have taken the spotlight in home kitchens everywhere, and it’s not hard to see why. They’re convenient, time-saving, and perfect for busy lifestyles. Here’s why they’re so popular:
- Zero Oven Time:
No need to preheat the oven or monitor baking times. This saves energy and keeps your kitchen cool—especially useful during the summer. - Quick Preparation:
With only a few simple ingredients and easy steps, you can prepare a dessert that looks like it came from a bakery. - Perfect for Beginners:
No-bake desserts are nearly foolproof. Even if you’re new to making layered desserts, the process is simple to follow. - Customizable for Any Occasion:
You can swap out flavors, toppings, and fruits to match the season or theme—like lime Jello for spring or raspberry for Valentine’s Day. - Beautiful Presentation:
The colorful layers and textures create a dessert that’s both eye-catching and delicious.
No-bake desserts like this one deliver maximum flavor with minimal effort, making them a go-to choice for home bakers who want professional-looking results with ease.
History and Background of Jello Lasagna Desserts
Layered gelatin desserts have been around for decades, dating back to mid-20th-century America, when gelatin was a staple in households. Families loved how versatile, affordable, and fun Jello was. It became the foundation for countless dessert variations—from fruit salads to creamy parfaits.
The “Jello Lasagna” concept evolved from the classic strawberry pretzel salad—a nostalgic Southern favorite featuring a salty pretzel crust, cream cheese filling, and strawberry Jello topping. Over time, creative home cooks adapted it into new versions with cookie or graham crusts, giving rise to today’s Strawberry Jello Lasagna.
This modern twist eliminates the baking step entirely while keeping the familiar flavor layers that everyone loves. It’s a testament to how timeless flavors—sweet strawberries, creamy filling, and crunchy crust—never go out of style.
Ingredients Overview and Substitutions
Understanding each component of this dessert is the key to success. Let’s break down the four major layers and how to adjust them to your preference or dietary needs.
1. Graham Cracker Crust
The base layer adds a buttery crunch that balances the creamy filling and fruity topping.
You’ll Need:
- 2 ½ cups graham cracker crumbs
- ½ cup melted unsalted butter
- 2 tablespoons granulated sugar
Substitutions:
- Use digestive biscuits or vanilla wafers for a milder flavor.
- Try crushed Oreos for a chocolate variation.
- Use gluten-free crackers if needed.
- Add a pinch of cinnamon for a warm undertone.
2. Cream Cheese Layer
This layer provides a smooth, rich, and tangy balance to the sweet Jello topping.
You’ll Need:
- 16 oz (450g) cream cheese, softened
- 1 cup powdered sugar
- 1 teaspoon vanilla extract
- 2 cups whipped topping (like Cool Whip)
Substitutions:
- Use vegan cream cheese or coconut cream for a dairy-free option.
- Replace powdered sugar with honey or stevia for a natural sweetener.
- Substitute Cool Whip with homemade whipped cream for a fresher flavor.
3. Strawberry Jello Layer
This is the show-stopping layer that gives the dessert its vibrant color and fruity taste.
You’ll Need:
- 1 (3 oz) package strawberry-flavored Jello
- 1 cup boiling water
- 1 cup cold water
- 2 cups sliced fresh strawberries
Substitutions:
- Use raspberry or cherry Jello for a different flavor profile.
- Combine unflavored gelatin with real fruit juice for a more natural option.
- Add mixed berries for a colorful variation.
4. Whipped Topping and Garnish
The final layer ties everything together with a light and creamy finish.
You’ll Need:
- 1 ½ cups whipped topping
- Fresh strawberries or mint leaves for garnish
Optional Toppings:
- Crushed graham crackers
- Shaved chocolate or toasted coconut
- A drizzle of strawberry syrup for visual flair
Step-by-Step Instructions

Step 1: Prepare the Graham Cracker Crust
- Combine graham cracker crumbs, melted butter, and sugar in a bowl.
- Mix until evenly coated and the texture resembles damp sand.
- Press the mixture firmly into a 9×13-inch dish using a measuring cup.
- Chill in the freezer for 10–15 minutes to set.
Pro Tips:
- Compact the crust well for a stable base.
- Avoid over-buttering—it can make the crust greasy.
- Add crushed nuts for an extra crunch.
Step 2: Create the Cream Cheese Layer
- Beat softened cream cheese, powdered sugar, and vanilla until smooth and fluffy.
- Gently fold in whipped topping using a spatula until fully combined.
- Spread evenly over the chilled crust.
- Refrigerate for at least 20 minutes before adding the Jello layer.
Pro Tips:
- Make sure cream cheese is at room temperature to avoid lumps.
- Add lemon zest or almond extract for a flavor boost.
- Chill this layer to firm it before adding Jello.
Step 3: Make the Strawberry Jello Layer
- Dissolve strawberry Jello in 1 cup of boiling water. Stir until completely dissolved.
- Add 1 cup of cold water and stir again.
- Let the mixture cool for 10–15 minutes at room temperature.
- Arrange sliced strawberries evenly on top of the cream cheese layer.
- Carefully pour the cooled Jello over the strawberries.
- Refrigerate for 4–6 hours, or until the Jello is firm.
Pro Tips:
- Never pour hot Jello—it will melt the cream cheese layer.
- If you prefer firmer Jello, reduce the cold water slightly.
- For a layered look, use two different Jello colors and chill between pours.
Step 4: Add Whipped Topping and Garnish
- Once Jello is set, spread whipped topping evenly over the surface.
- Garnish with sliced strawberries or mint leaves.
- Chill again for 15–30 minutes before serving.
Pro Tips:
- Use a clean, sharp knife for neat slices.
- Wipe between cuts to maintain defined layers.
- Serve chilled for best flavor and texture.
Creative Variations
- Chocolate Strawberry Lasagna:
Swap the graham crust for Oreos and drizzle chocolate syrup on top. - Mixed Berry Lasagna:
Use blueberry and raspberry Jello layers with fresh mixed berries. - Tropical Twist:
Try pineapple Jello and coconut whipped cream for a summery vibe. - Lemon Cream Version:
Substitute strawberry Jello with lemon flavor for a refreshing citrusy taste. - Holiday Style:
Use red and green Jello for Christmas or heart-shaped strawberries for Valentine’s Day.
Storage and Make-Ahead Tips
- Refrigeration: Store covered in the fridge for up to 3–4 days.
- Freezing: Not recommended—Jello loses its texture after thawing.
- Make-Ahead: You can prepare the crust and cream cheese layers a day early. Add Jello the next day for the freshest presentation.
- Serving Tip: Keep chilled until serving to maintain firm layers.
Nutritional Information (Per Serving)
| Component | Amount |
|---|---|
| Calories | ~320 kcal |
| Carbohydrates | 35g |
| Protein | 4g |
| Fat | 18g |
| Fiber | 1g |
| Sugar | 25g |
Note: Nutritional values may vary depending on ingredient brands or substitutions.
Common Mistakes and Fixes
- Crumbly Crust: Add a bit more melted butter or press the crust more firmly.
- Runny Cream Cheese Layer: Chill longer before adding Jello; ensure cream cheese is softened.
- Jello Mixing with Cream Layer: Always cool Jello to room temperature first.
- Soft Jello Texture: Measure water precisely and dissolve powder completely.
- Sliding Layers: Refrigerate overnight for perfect stability before cutting.
Expert Tips for Perfect No-Bake Desserts
- Always chill between layers for a firm structure.
- Use full-fat cream cheese for the creamiest texture.
- For a bakery-style look, use a glass dish to showcase the layers.
- Add a touch of lemon juice to the cream layer for a balanced flavor.
- When serving at parties, keep it on ice to maintain firmness.
Serving Suggestions
- Serve chilled in neat slices with a mint garnish.
- Pair with iced coffee, lemonade, or strawberry milkshakes.
- Turn leftovers into mini dessert cups layered in small jars—perfect for picnics or lunchboxes.
- Sprinkle crushed freeze-dried strawberries on top for a gourmet touch.
FAQs

1. Can I make this dessert a day ahead?
Yes! It’s even better the next day since the layers set completely overnight.
2. Can I use frozen strawberries?
You can, but thaw and drain them well before layering to avoid excess moisture.
3. Can I use sugar-free Jello and light cream cheese?
Absolutely. It reduces calories while keeping the same great taste.
4. Why did my Jello not set?
Ensure it’s fully dissolved in boiling water before adding cold water, and don’t add too much liquid.
5. Can I make this dessert in individual cups?
Yes! Layer the ingredients in clear cups for single-serve party treats.
6. How long will it last in the refrigerator?
Up to 4 days when tightly covered.
7. Can I replace whipped topping with real whipped cream?
Yes, but stabilize it with powdered sugar or gelatin so it doesn’t deflate.
Conclusion
The No-Bake Strawberry Jello Lasagna is proof that simple ingredients can create something extraordinary. With its creamy, fruity, and refreshing layers, it’s a dessert that captures both elegance and ease. Whether for a family dinner, summer barbecue, or special celebration, it’s guaranteed to impress every time.
Best of all, this no-bake treat gives you bakery-level presentation without the hassle of baking. Once you master it, you’ll find endless ways to customize it for every season or event