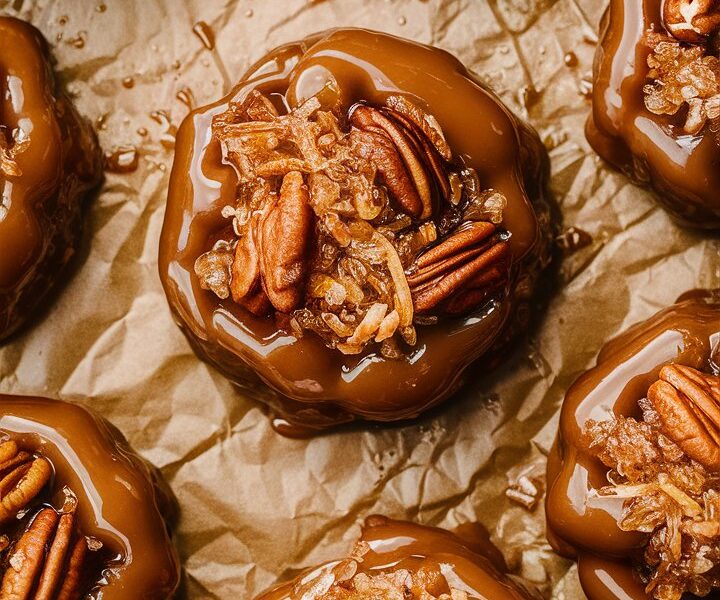
When it comes to Southern-inspired desserts that combine indulgence with simplicity, no-bake coconut pecan pralines stand out as a true crowd-pleaser. These bite-sized treats capture the buttery sweetness of pralines while introducing the chewy texture of coconut for a tropical twist. Best of all, they skip the hassle of candy thermometers and complicated stovetop monitoring, making them beginner-friendly yet elegant enough for special occasions.
In this comprehensive guide, we’ll dive deep into everything you need to know about making, customizing, storing, and serving no-bake coconut pecan pralines. You’ll learn the history behind pralines, discover why this recipe works, explore expert tips to avoid common mistakes, and even find creative variations that cater to dietary needs like vegan, gluten-free, and low-sugar lifestyles.
By the end, you’ll not only master this recipe but also understand how to elevate it into a signature dessert for holidays, parties, or everyday indulgence.
The History of Pralines and Their Southern Legacy

To appreciate this recipe, it helps to understand its heritage. Pralines originated in 17th-century France, where sugar-coated almonds were the signature treat. French settlers later brought the tradition to Louisiana, where almonds were replaced with locally abundant pecans, and cream was introduced to create a richer, smoother texture.
Over time, pralines became a hallmark of Southern confectionery culture, particularly in New Orleans, where shops and street vendors still sell them warm, wrapped in parchment paper. They symbolize hospitality, celebration, and the fusion of European techniques with American ingredients.
This no-bake version pays homage to that legacy while making the process faster, easier, and more approachable. Instead of standing over a pot with a candy thermometer, you simply melt, mix, and shape—yet the results still capture the caramelized flavor and nutty crunch of the classic praline.
Why Choose No-Bake Coconut Pecan Pralines?
There are plenty of desserts you can make at home, but these pralines hold special appeal:
- No Oven Required – Perfect for hot days when you don’t want to heat the kitchen.
- Quick and Easy – Ready in about 30 minutes with minimal equipment.
- Beginner-Friendly – No candy thermometer or advanced skills needed.
- Customizable – Can be made vegan, dairy-free, gluten-free, or low-sugar with simple swaps.
- Perfect for Gifting – Their rustic, handcrafted look makes them ideal for holiday tins, party favors, or edible presents.
- Crowd-Pleasing Flavor – Combines nutty, buttery, and chewy textures into one irresistible bite.
Simply put, they’re the best of both worlds: old-fashioned flavor with modern convenience.
Ingredients Breakdown
Every great recipe starts with quality ingredients. Here’s what you’ll need and why each ingredient matters:
Key Ingredients
- Unsalted Butter – Provides richness and a velvety base. Unsalted is preferred for better flavor control.
- Brown Sugar – Gives pralines their signature caramel flavor thanks to the molasses content.
- Milk (Whole or Evaporated) – Helps dissolve sugar and creates a creamy consistency. Evaporated milk gives a thicker texture.
- Powdered Sugar – Sweetens and thickens the mixture, helping pralines set.
- Vanilla Extract – Adds depth and warmth to balance the sweetness.
- Sweetened Shredded Coconut – Brings chewiness and a tropical flair.
- Chopped Pecans – The heart of pralines, adding crunch and buttery nuttiness.
Ingredient Substitutions
- Butter → Coconut oil or vegan margarine for a dairy-free version.
- Milk → Almond milk, coconut milk, or oat milk for vegan options.
- Coconut → Unsweetened coconut for less sweetness, or toasted coconut for a deeper flavor.
- Pecans → Walnuts, almonds, or cashews. For nut-free, try sunflower seeds.
- Sugar → Coconut sugar, monk fruit sweetener, or erythritol for low-sugar variations.
Step-by-Step Instructions
Step 1: Make the Caramel Base
- In a medium saucepan, combine butter, brown sugar, and milk.
- Stir constantly over medium heat until the butter melts and sugar dissolves.
- Bring to a gentle boil and cook for about 2 minutes.
- ⚠️ Don’t overboil—this can make pralines hard instead of chewy.
Step 2: Remove from Heat and Flavor
- Take the pan off the stove.
- Stir in powdered sugar gradually to prevent lumps.
- Mix in vanilla extract for a warm, aromatic note.
Step 3: Add Coconut and Pecans
- Fold in shredded coconut and chopped pecans.
- Mix until everything is evenly coated in the caramel base.
Step 4: Shape the Pralines
- Line a baking sheet with parchment paper.
- Drop spoonfuls of the mixture onto the sheet, spacing them apart.
- Adjust size using a teaspoon (small bites) or tablespoon (larger treats).
Step 5: Let Them Set
- Leave at room temperature for about 30 minutes.
- For faster results, refrigerate for 15–20 minutes.
Step 6: Store Properly
- Store in an airtight container at room temperature for up to 1 week.
- Refrigerate for up to 2 weeks.
- Freeze for up to 3 months (layer with parchment to prevent sticking).
Tips and Tricks for Perfect Pralines

- Boil Exactly 2 Minutes – Too short = won’t set, too long = brittle.
- Use Heavy-Bottomed Pan – Prevents burning and distributes heat evenly.
- Avoid Graininess – Make sure sugar is fully dissolved before boiling.
- Don’t Rush Cooling – Allow pralines to firm at room temp for the best texture.
- For Glossy Finish – Add a teaspoon of corn syrup to the caramel base.
Variations of the Recipe
- Chocolate Coconut Pecan Pralines – Stir in mini chocolate chips or drizzle melted chocolate on top.
- Sweet & Salty Pralines – Sprinkle sea salt flakes before they set.
- Holiday Pralines – Add cinnamon, nutmeg, or pumpkin spice for seasonal flair.
- Dried Fruit Mix – Fold in cranberries, raisins, or apricots.
- Toasted Coconut Version – Toast coconut and pecans before adding for extra crunch.
- Low-Sugar Version – Swap sugar with erythritol and use unsweetened coconut.
- Vegan-Friendly – Use coconut oil + almond milk + vegan sugar.
Nutritional Information (per praline, approx.)
- Calories: 150–180
- Carbohydrates: 16g
- Sugar: 12g
- Fat: 10g
- Protein: 2g
- Fiber: 1g
(Values vary depending on portion size and ingredient substitutions.)
Serving and Presentation Ideas
- Serve with coffee or tea as an afternoon pick-me-up.
- Package in gift bags or tins for holidays, weddings, or parties.
- Use as a topping for ice cream or yogurt parfaits.
- Pair with a charcuterie dessert board alongside fruits and chocolates.
Common Issues and How to Fix Them
- Pralines too soft? → Boiled too briefly; refrigerate to firm.
- Pralines too hard? → Overcooked; try reducing boiling time next batch.
- Grainy texture? → Sugar not fully dissolved; stir longer before boiling.
- Sticky pralines? → Store with parchment layers between them.
Frequently Asked Questions (FAQs)
Q1: Can I freeze no-bake coconut pecan pralines?
Yes! Place them in an airtight container with parchment between layers. Freeze for up to 3 months.
Q2: Can I make them without coconut?
Absolutely. Simply replace coconut with more chopped pecans or another nut/seed.
Q3: Do I need a candy thermometer?
No. This recipe is designed to work without one—just boil for about 2 minutes.
Q4: Can I use white sugar instead of brown sugar?
Brown sugar is preferred for its caramel flavor, but you can use white sugar with a tablespoon of molasses for a similar result.
Q5: How long do they last?
At room temperature, about 1 week. Refrigerated, up to 2 weeks. Frozen, up to 3 months.
Expert Tips to Elevate Your Recipe

- Toast pecans for a buttery, nutty depth.
- Use pure vanilla extract instead of imitation for richer flavor.
- For gourmet pralines, drizzle with dark chocolate and sprinkle with sea salt.
- Try shaping them in silicone molds for more uniform, professional-looking pieces.
Final Thoughts
No-bake coconut pecan pralines combine the rich tradition of Southern sweets with the convenience of modern, fuss-free cooking. They’re quick, customizable, and always a hit whether served at a holiday table, gifted to friends, or enjoyed as a simple afternoon indulgence.
With this guide, you now have everything you need—from history and ingredient knowledge to step-by-step instructions, troubleshooting tips, and creative variations. By experimenting with flavors and techniques, you can make this classic treat your own while keeping it deliciously chewy, nutty, and satisfying.