
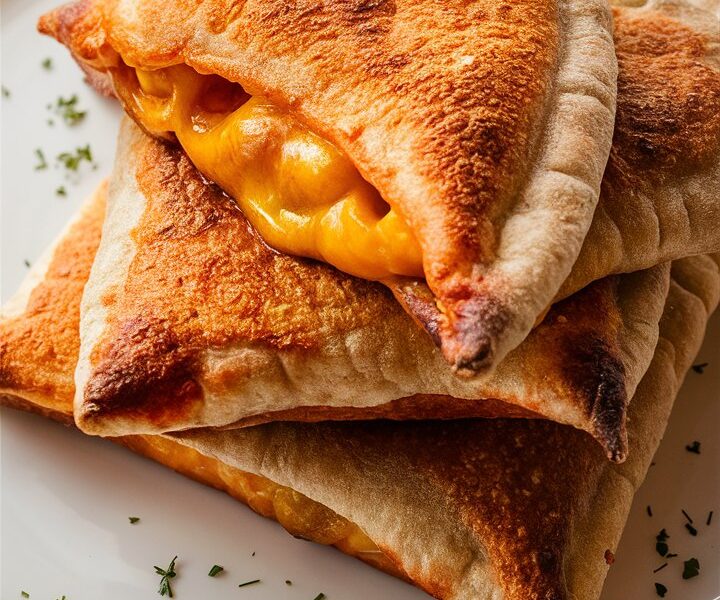
If you’re craving the comforting flavors of pizza but want something more portable, crispy, and snackable — this Cheesy Pizza Pockets Recipe is your dream come true. These homemade pockets are bursting with gooey mozzarella cheese, savory pizza sauce, and your favorite toppings, all wrapped in a golden, flaky crust. Whether you’re preparing a quick lunch, a fun dinner, or a grab-and-go snack, these pizza pockets deliver all the joy of pizza in a hand-held treat that everyone, especially kids, will love.
Forget the store-bought frozen versions — making pizza pockets at home is not only more delicious but also healthier and more customizable. Let’s explore everything you need to know to make the best cheesy pizza pockets ever, from their history to the exact techniques that ensure a perfectly crispy crust and a melty, cheesy center every time.
🍕 A Quick Look at the History of Pizza Pockets

Pizza pockets may sound like a modern snack innovation, but their roots trace back to the age-old tradition of stuffed breads and pastries. Cultures around the world have long loved the idea of wrapping dough around a savory filling — from Italian calzones to Latin American empanadas, and even British pasties. The pizza pocket, as we know it today, is a clever American adaptation that merges the heart of Italian pizza with the convenience of handheld food.
In the 1980s, the concept became mainstream thanks to the introduction of Hot Pockets, a frozen snack designed for quick microwaving. But while the commercial version became a household staple, homemade pizza pockets are on a completely different level — fresher, flakier, and bursting with real flavor. Making them from scratch allows you to control every ingredient, from the crust to the fillings, ensuring a snack that’s both indulgent and wholesome.
❤️ Why You’ll Love This Recipe
- Crispy on the outside, melty inside: A perfect balance of textures that rivals your favorite pizza joint.
- Kid-friendly: Children adore these pockets — they’re fun to eat, mess-free, and easy to pack in lunchboxes.
- Customizable: Choose your favorite fillings — pepperoni, mushrooms, spinach, sausage, or even pineapple!
- Make-ahead friendly: You can freeze them and reheat later for a quick meal or snack.
- Healthier than frozen options: You control the oil, salt, and preservatives.
- Budget-friendly: Homemade ingredients cost a fraction of what pre-packaged snacks do.
🧂 Key Ingredients Explained
Let’s break down what you need to make these perfect pizza pockets.
For the Dough
- All-purpose flour: Provides structure and chewiness.
- Instant yeast: Helps the dough rise quickly and gives it that classic pizza flavor.
- Warm water: Activates the yeast and brings the dough together.
- Olive oil: Adds richness and helps crisp the crust.
- Salt & sugar: Balance the flavors and enhance fermentation.
(Shortcut option: You can use refrigerated pizza dough or crescent roll dough if you’re short on time.)
For the Filling
- Pizza sauce or marinara: The base that binds all the flavors together.
- Mozzarella cheese: The essential gooey component — use whole milk mozzarella for maximum stretch.
- Toppings: Pepperoni, diced bell peppers, onions, mushrooms, cooked sausage, or any combination you love.
- Italian seasoning: A blend of oregano, basil, and thyme adds a true pizzeria aroma.
- Parmesan (optional): A sprinkle for extra cheesy flavor.
For Finishing
- Egg wash (1 beaten egg + 1 tbsp water): Brushed on top to create a golden, shiny crust.
- Garlic butter (optional): For brushing after baking — gives a rich, restaurant-style finish.
👩🍳 Step-by-Step Instructions
Step 1: Prepare the Dough
- In a large mixing bowl, combine warm water, yeast, and sugar. Let it sit for 5–10 minutes until frothy.
- Add olive oil, salt, and gradually mix in the flour until a soft dough forms.
- Knead for about 7–8 minutes until smooth and elastic.
- Cover with a damp towel and let it rise for about 1 hour, or until doubled in size.
Step 2: Prepare the Filling
- While the dough rises, chop your toppings and grate your cheese.
- Warm your pizza sauce slightly — this helps it spread more easily.
Step 3: Roll and Fill
- Preheat the oven to 400°F (200°C).
- Punch down the risen dough and divide it into equal portions.
- Roll each piece into a 5–6-inch circle.
- Spread a spoonful of sauce on half of each circle, leaving a border around the edge.
- Add cheese and your chosen toppings.
- Fold the dough over and press the edges with a fork to seal.
Step 4: Bake to Perfection
- Place pockets on a parchment-lined baking sheet.
- Brush the tops with egg wash.
- Bake for 15–18 minutes, until golden brown and crisp.
- Brush with garlic butter immediately after baking, if desired.
Step 5: Cool and Serve
- Allow the pockets to cool for 5 minutes before serving — the filling will be molten hot!
🧑🍳 Expert Tips for Perfect Pizza Pockets
- Avoid overfilling. Too much filling can cause leaks.
- Seal edges tightly. Use a fork or pinch and twist method.
- Use parchment paper. Prevents sticking and ensures even baking.
- Cheese placement matters. Put cheese both under and over the toppings for the best melt.
- Don’t skip egg wash. It’s the secret to that golden, bakery-style crust.
- Use chilled dough for clean shaping. Easier to handle and less sticky.
- Experiment with air frying. Air fry at 375°F (190°C) for 10–12 minutes for extra crispiness.
🌈 Flavor Variations

- Classic Pepperoni: Sauce, mozzarella, and mini pepperoni slices.
- Veggie Delight: Bell peppers, onions, spinach, olives, and mushrooms.
- BBQ Chicken: Shredded chicken, BBQ sauce, red onions, and cheddar.
- Meat Lovers: Sausage, pepperoni, bacon bits, and mozzarella.
- Hawaiian: Ham, pineapple, and mozzarella for a sweet-savory bite.
- Cheesy Explosion: Mix mozzarella, provolone, and cheddar for triple-cheese bliss.
- Breakfast Pocket: Scrambled eggs, cheese, and crumbled bacon.
⚠️ Common Mistakes & How to Fix Them
| Problem | Likely Cause | Solution |
|---|---|---|
| Dough is too hard | Over-kneaded or not enough water | Add a tbsp of olive oil and rest it longer |
| Filling leaks out | Edges not sealed | Use a fork and seal twice |
| Undercooked bottom | Oven too cool | Use a preheated baking sheet or pizza stone |
| Soggy texture | Overloaded sauce | Spread thin, even layers |
| Cheese burns | Too close to heat source | Move rack to middle position |
🍽️ Serving Suggestions
- Dipping sauces: Serve with marinara, garlic butter, or ranch dressing.
- Side dishes: Pair with a green salad, baked fries, or vegetable sticks.
- Lunchbox idea: Wrap cooled pockets in foil for school lunches.
- Party platter: Make mini versions for finger food at gatherings.
- Movie night snack: Serve warm with extra sauce for dipping.
❄️ Storage, Freezing & Reheating Guide
- To store: Keep in an airtight container for up to 3 days in the refrigerator.
- To freeze (before baking): Arrange unbaked pockets on a tray, freeze solid, then store in freezer bags.
- To freeze (after baking): Cool completely before freezing.
- To reheat:
- Oven: 375°F for 8–10 minutes (crispiest results).
- Air fryer: 350°F for 6–8 minutes.
- Microwave: 1–2 minutes (quick but softer crust).
🧮 Nutritional Information (Approx. per Pocket)
| Nutrient | Amount |
|---|---|
| Calories | 280–320 kcal |
| Protein | 12g |
| Carbohydrates | 34g |
| Fat | 12g |
| Saturated Fat | 5g |
| Fiber | 2g |
| Sodium | 520mg |
(Values vary depending on fillings and dough type.)
🥗 Health Benefits of Homemade Pizza Pockets
- Less processed ingredients: No artificial preservatives or stabilizers.
- Control over sodium and fats: Adjust to your dietary needs.
- Increased protein: Add lean meats or plant-based options.
- Hidden veggies: Finely chop spinach, mushrooms, or peppers for picky eaters.
- Whole grain upgrade: Use whole wheat flour for extra fiber.
Homemade pizza pockets can be as indulgent or as healthy as you want. That’s the real advantage — you control the quality, freshness, and nutrition.
❓ Frequently Asked Questions

Q1: Can I make pizza pockets without an oven?
Yes! You can air fry them at 375°F for 10–12 minutes or pan-fry on low heat until golden and cooked through.
Q2: Can I use store-bought pizza dough?
Absolutely. It saves time and still tastes great. Just bring it to room temperature before rolling.
Q3: How do I keep the pockets from getting soggy?
Avoid overfilling with sauce and bake on parchment paper at high heat.
Q4: Can I make them vegetarian or vegan?
Yes. Use dairy-free cheese and your favorite vegetables or plant-based proteins.
Q5: How long can I store them in the freezer?
Up to 3 months if properly sealed in freezer-safe bags.
Q6: What’s the best cheese to use?
Mozzarella is classic, but cheddar, provolone, or even smoked gouda add amazing depth.
🧀 Final Thoughts
There’s something universally satisfying about biting into a freshly baked Cheesy Pizza Pocket — crispy edges, a soft interior, and molten cheese stretching with every bite. It’s comfort food, party food, and family food all rolled into one.
Unlike frozen snacks, these homemade pizza pockets are crafted with real ingredients and real flavor. Whether you make them for your kids’ lunchboxes, weekend snacks, or game-day parties, they’ll always disappear fast. Once you try making them from scratch, you’ll never go back to the store-bought kind again.